
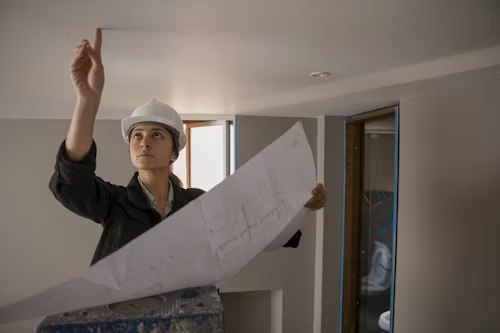
Booking a home inspection is one of the most practical steps a buyer or property owner can take. Whether it’s for a newly built home or an older property with history behind it, an inspection reveals details not visible during a standard walkthrough. This process ensures you’re not inheriting problems that cost time and money later on.
For owners of new homes, inspections often extend to include a warranty defect inspection, which is carried out before the end of the builder’s liability period. Understanding how the process unfolds from the first phone call to the final report helps manage expectations and strengthens your position as a buyer or property manager.
Booking the Home Inspection
Selecting the Right Professional
The first step in arranging a home inspection involves choosing a qualified, insured inspector. This person should have experience relevant to your type of property and understand the building codes specific to your state or territory.
Buyers usually find inspectors through referrals, online directories or local agents. Always verify that the inspector is accredited and carries professional indemnity insurance, as this provides protection in case of oversight or error.
Inspectors experienced in post-construction checks will also offer services like a warranty defect inspection, particularly important for newly completed houses or units. This ensures that building work complies with the standards outlined in your contract and Australian building codes.
Coordinating with the Seller or Agent
Once you’ve selected an inspector, the next stage is confirming the appointment. If you are buying, your real estate agent usually handles access arrangements with the vendor. If you’re the property owner, make sure all areas of the home are accessible before the inspection date.
Inaccessible parts of the house, such as roof cavities or subfloors, may be listed as “not inspected,” which reduces the thoroughness of the final report.
Preparing for the Inspection
Clearing Access to Key Areas
Preparation is not only the inspector’s responsibility. Sellers or occupants should ensure the property is ready. This means removing items blocking access to electrical panels, manholes, or underfloor entry points. Incomplete inspections often delay the delivery of findings or reduce the report’s reliability.
Sharing Past Documentation
If previous reports exist, such as earlier building inspections or pest reports, it’s a good idea to make these available. They provide the inspector with background information and help them track changes or new issues that may have developed.
Arrival and Equipment Setup
Tools of the Trade
Inspectors arrive with specialised equipment. This includes moisture meters for detecting leaks inside walls, thermal cameras to identify insulation gaps or heat loss, ladders to access roof areas, and basic electrical testing tools for checking power points. They may also use long-reach camera poles to inspect inaccessible gutters or roof sections from the ground.
Personal Protective Equipment
Inspectors often wear protective gear including gloves, masks, or helmets, especially when entering dusty subfloors or tight roof spaces. These areas are often where early signs of damage first appear, such as rotting timber, water ingress, or pest activity.
The Inspection: Step by Step
Starting Outside the Property
The inspector typically begins with the exterior of the home. The site inspection includes evaluating roof condition, exterior walls, foundations, decks or balconies, driveway conditions, and overall drainage. Damage from water runoff, cracking in render or brickwork, or sagging gutters are all areas of concern.
Vegetation close to the home may be flagged as a pest risk. Drainage around the building is also checked for signs of erosion or pooling water, which could suggest grading issues.
Inspecting the Roof and Attic
Once the exterior is completed, the inspector enters the roof space if accessible. They examine the structural framing, insulation condition, signs of past or present leaks, and whether ventilation is adequate. If the inspector cannot safely access the roof due to pitch or weather, they will note this in the report and may recommend further inspection.
Roofing materials are also viewed from ground level or using technology. Missing tiles, rusted flashing, or uneven ridges may be noted as future maintenance or immediate concerns, depending on severity.
Internal Walkthrough
The interior of the home is inspected room by room. Inspectors look for wall cracks, ceiling movement, sagging floors, or signs of mould. Doors and windows are checked for operation and alignment, which can signal foundation movement or moisture problems.
Special attention is given to kitchens, bathrooms and laundries. These rooms often hide issues like leaking pipes, poor ventilation, or failed waterproofing. Loose fixtures, water stains on cabinetry, and slow drainage are also recorded as potential concerns.
Subfloor Inspection
If the house has a raised floor, the subfloor space is examined. The inspector looks at support piers, floor joists, ventilation systems, moisture levels and signs of termite activity. This part of the home is often overlooked but can reveal foundational issues or pests before they become severe.
Where access is not available due to stored items or sealed perimeters, the inspector will explain these limitations in the report.
General Electrical and Plumbing Observations
Although inspectors are not licensed electricians or plumbers, they can provide general observations. They will test light switches and visible power outlets, note the condition of switchboards, and assess water flow, drainage, and pipe condition where visible.
Major faults like exposed wiring or visibly rusted hot water systems are identified. Where serious issues are suspected, the inspector may recommend further checks by licensed trades.
What Happens After the Inspection
Verbal Summary
If you attend the inspection or arrive near the end, the inspector may provide a quick rundown of any major defects identified. This overview is informal but helpful in managing immediate concerns or asking questions before the written report is issued.
Compiling the Inspection Report
The formal report is completed within 24 to 48 hours, depending on the inspector’s workload and the property’s complexity. This document is structured by area—external, internal, roof, subfloor—and includes a summary of observations and recommendations.
Each defect is listed with a description, the likely cause, and whether it is considered minor, moderate or significant. Photographs are used to support observations and pinpoint the issue’s location. These visual references are helpful when obtaining repair quotes or negotiating with sellers.
Reading and Using the Report
Assessing Severity
When reading your report, take note of how issues are categorised. Some are cosmetic, such as chipped tiles or faded paint. Others are more serious, like structural cracks, active leaks, or termite activity.
Defects categorised as safety hazards should be prioritised. These include unstable balustrades, damaged electrical wiring, or roof sections at risk of collapse. Items flagged as “monitoring recommended” are typically early-stage issues that don’t require immediate repair but may worsen if left untreated.
Making Decisions
Buyers can use the report to decide whether to proceed with a purchase, renegotiate price, or request repairs before settlement. For sellers, identifying issues early allows time to make improvements before listing. Owners of new builds can use the report to submit a warranty defect inspection list before their statutory warranty period ends.
The report also helps in long-term maintenance planning. Even if no urgent repairs are needed, knowing what to watch for helps prevent small problems from becoming major costs later.
Frequently Asked Questions
How long does a typical home inspection take from start to finish?
Most inspections take one to two hours on site, depending on the property’s size and accessibility. The report is usually delivered within 48 hours, allowing time for follow-up questions or negotiations.
Is it worth doing a home inspection on a brand new house?
Yes. New homes are not immune to defects. A warranty defect inspection can reveal problems such as poor workmanship, structural flaws, or non-compliance with building standards. These should be fixed under the builder’s warranty.
What if part of the property cannot be accessed?
If the inspector cannot safely access areas like roof voids or subfloors, this will be noted in the report. The inspector may recommend that access be made available for a follow-up visit or advise that limitations reduce the report’s completeness.
Conclusion
Understanding what happens during a home inspection from start to finish puts buyers, owners, and sellers in a stronger position. From the moment you book to the delivery of your report, each step is designed to provide transparency, reveal risks, and support better decision-making.
Whether you’re inspecting an older home or arranging a warranty defect inspection for a newly completed build, a thorough and timely inspection is one of the best tools you can use to safeguard your investment. With the right approach, you’ll avoid surprises, reduce financial risk, and gain confidence in the property’s condition before taking your next step.